
To see if this custom-fit item will work for you please tell us what vehicle you'll use it with.


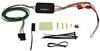
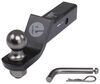
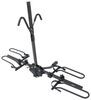
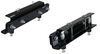
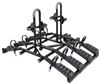
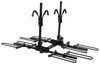
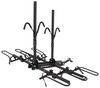
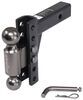
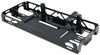
This fully welded trailer hitch receiver bolts onto your vehicle's frame with no welding required. Textured black powder coat over e-coat shields against rust and corrosion. Mounting bracket for wiring is welded on for a clean look.
Features:
Specs:
At etrailer.com we're committed to the products we sell, and to our customers. Our experienced and knowledgeable staff are available via both phone and email to address your questions and concerns for the lifetime of your hitch. The technicians at etrailer perform hitch installations on a daily basis, making them a valuable resource for do-it-yourselfers. The one-on-one, personal service you'll receive comes straight from an expert in the towing and automotive field. We've installed it, we've wired it and we've towed with it, so whatever your question, we can answer it.

California residents: click here
Customer Satisfaction Score:
91% were satisfied with this product
9% of customers were not satisfied
Ratings & Reviews

Did not get to install yet, so we shall see, but so far very pleased with what i see
Awesome trailer hitch
Accurate and quick

Do you have a question about this Trailer Hitch?
Info for this part was:
At etrailer we provide the best information available about the products we sell. We take the quality of our information seriously so that you can get the right part the first time. Let us know if anything is missing or if you have any questions.


Thank you! Your comment has been submitted successfully. You should be able to view your question/comment here within a few days.
Error submitting comment. Please try again momentarily.